There are still people who are very new to Mac. There are very few differences you can find in a Mac laptop compared to regular Dell and HP laptops. You must be wondering how to crop a screenshot on Mac. Well, that is exactly what we are going to be talking about in this article. Taking a screenshot is pretty simple but then cropping afterward is sometimes become a difficult task. But no worries as there is a way to take a cropped screenshot on Mac.
How to Crop a Screenshot on Mac
When you take a screenshot, you can easily edit it anytime you like. But wouldn’t that be time-consuming? We will guide you on how to crop a screenshot on mac. There are several techniques that you can use but we have the best one available to you. Just like any other dell or hp computer, Mac has shortcut keyboard keys that you can take advantage of. You can either take the full screenshot or you can always take a screenshot of a specific area and save it on your desktop.
Use Shortcut Keys to Take a Cropped Screenshot
Mac has a built-in screenshot app installed in its system. If you want to capture a certain part of your Mac screen then you need to press three Shift+Command+5 keys all at once to take a cropped screenshot mac. Here is how to crop a screenshot on mac using the screenshot bar shortcut key:
- Press the Shift+Command+5 keys to open the screenshot app bar.

- At the screenshot bar, click on the relevant square crop icon to take the Screenshot.
- Select the window whose screenshot you would like to take.
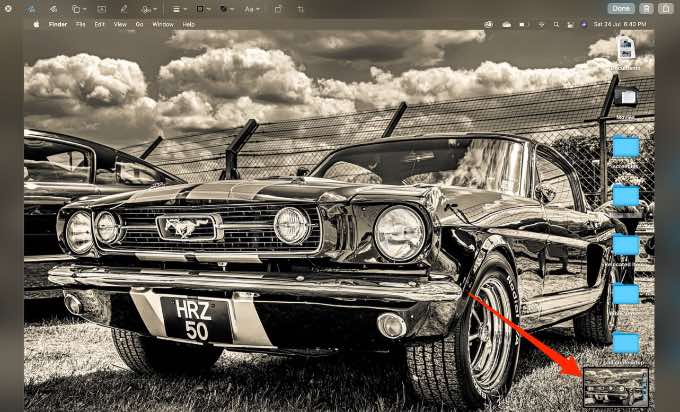
- Finally, the thumbnail of your captured shot will appear.
There are a lot more options available to you on the built-in screenshot app. You can also choose to screen record using this app.
Crop a Screenshot on Mac Using the Preview Tool
Each time you take a screenshot, there is always a preview that appears on your screen. That preview tool can help you crop that very screenshot you took. You can use this tool by pressing the crop button and resizing any image you like. Here is how to crop a screenshot on Mac using the preview tool:
- Press the shift+Command+3 keys to take the screenshot and after get the preview tool to open.
- With the preview tool, open the screen you want to crop.
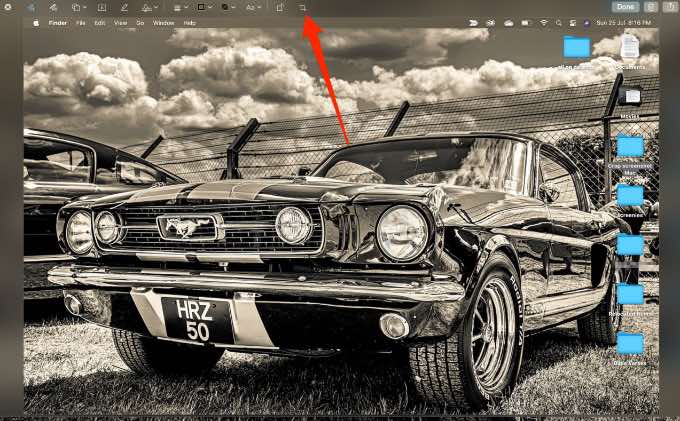
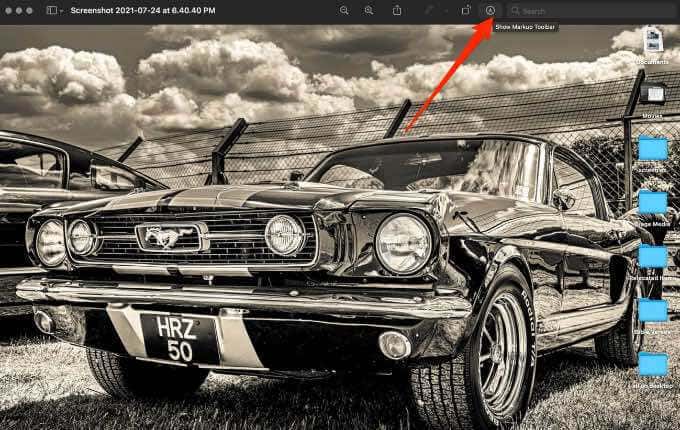
- Click on the “Show Markup toolbar” with a pencil-shaped icon.
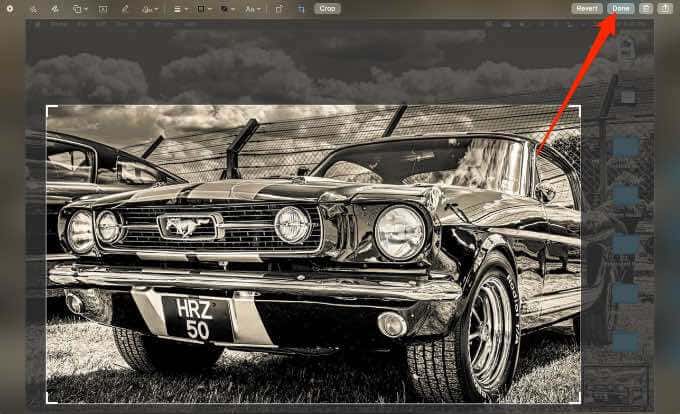
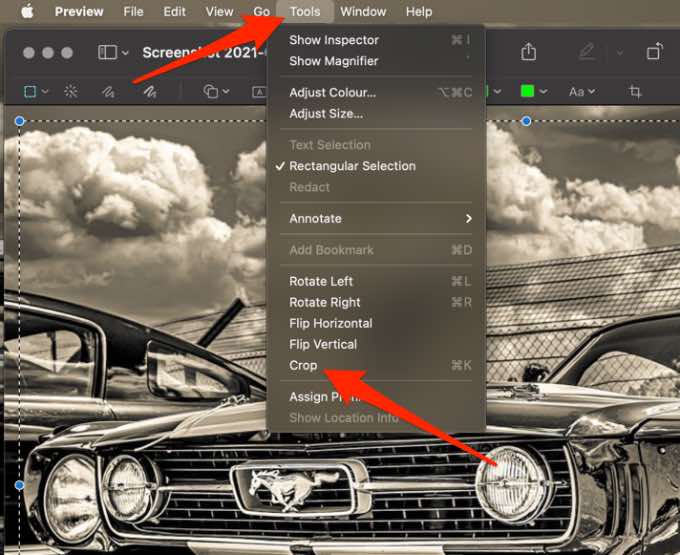
- Click and drag your selection, and then go to the “Tools” option.
- Afterward, click on “Crop”. This will crop your selected area. You can also use the Command+K buttons to crop the image.
- Finally, just save the image.
Take a Cropped Screenshot of Any Area
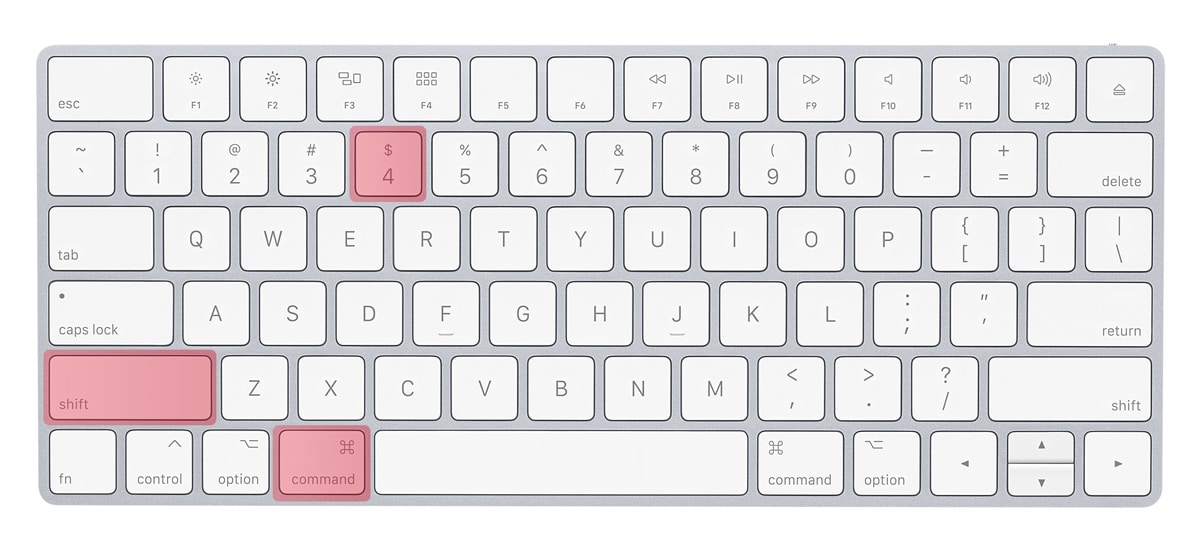
If you want to take a screenshot of a certain area on your screen then you need to use the Shift+Command+4 Shortcut keys. Here is how to do it:
- Press the Shift+Command+4 keys all at once.
- Afterward, a crosshair will appear as your mouse pointer.
- Click and drag your selection and release so that the screenshot of the selected area can be taken.
Note: You can always cancel the action by pressing the Escape button. So that you can again select a different area to capture before releasing your mouse button or trackpad.
Summary
Here in this article, we have provided you with the best solutions in order for you to learn How to crop a screenshot on mac. There are three techniques mentioned that will help you on your quest to take a Screenshot. These three techniques can be used to capture a screenshot using Mac’s own built-in screenshot app. For that, you need to use the Shift+Command+5 keys mentioned in the first technique which will open up the screenshot bar for you. In the 2nd technique, you can take a screenshot of the full window by pressing Shift+Command+3, now use the preview tool to crop. In the final method, you can always take another shortcut and press the Shift+Command+4 keys to take a screenshot of the selected area. Thanks for reading!